


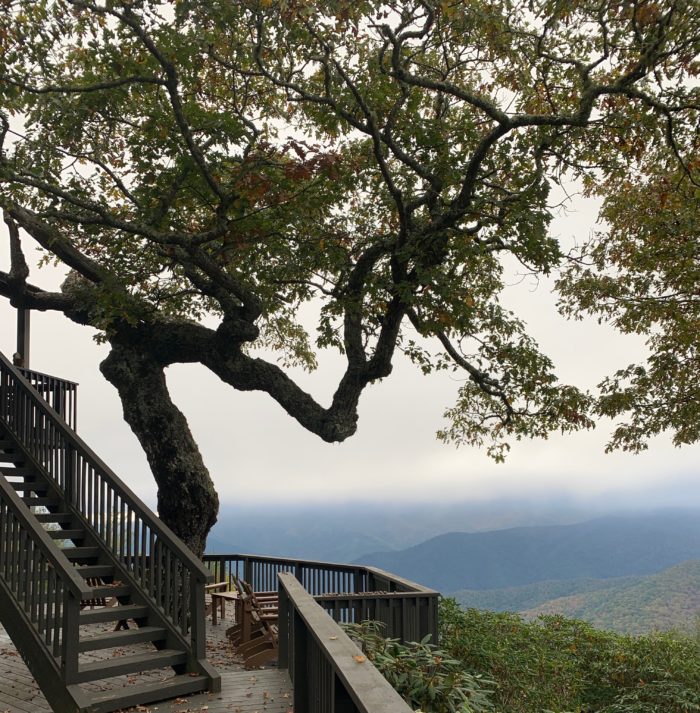
IT’S HARD NOT to notice, the way they line the path from the house to the studio, the way they’ve dropped this year by the thousands. They way they dwarf the lookalike versions that now pave our long mountain driveway.
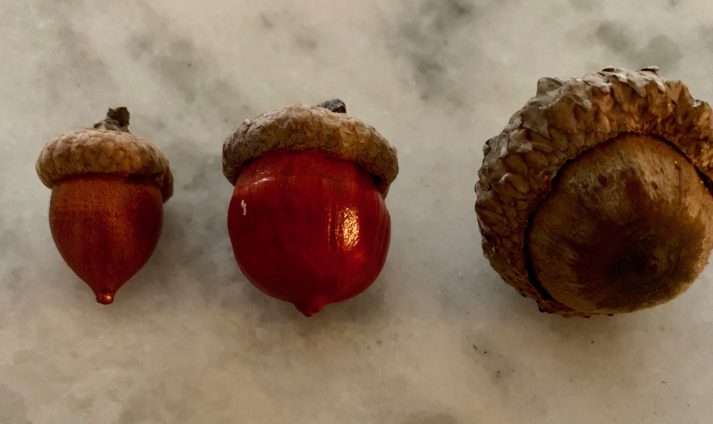
They’ve come from the Mother Tree, this I should explain. The old gal, it feels to me, has become most intentional in her determination to reproduce. I mean. Just look at a “normal” sized acorn when compared to hers.
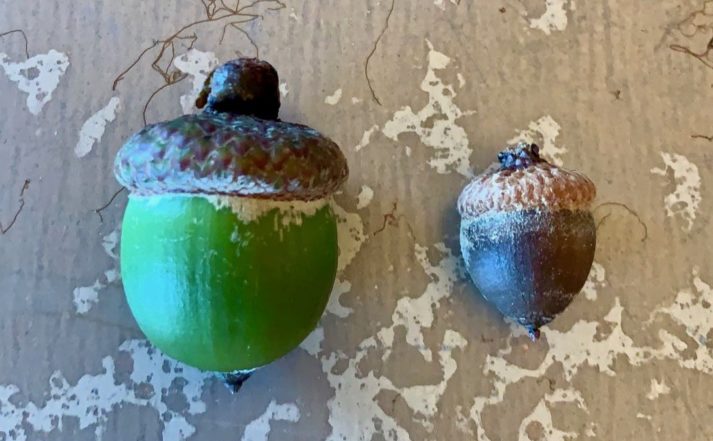
A person should honor such resolve, that’s what I think. Also, in my defense (see: intervention, below*), I was captivated by their lovely new-acorn green. It’s a gorgeous color that feels to me a mix of fall and spring, transition and renewal, old and young, wisdom that has maintained the enthusiasm of youth.
(I ask you: Who would not want to bottle that?)
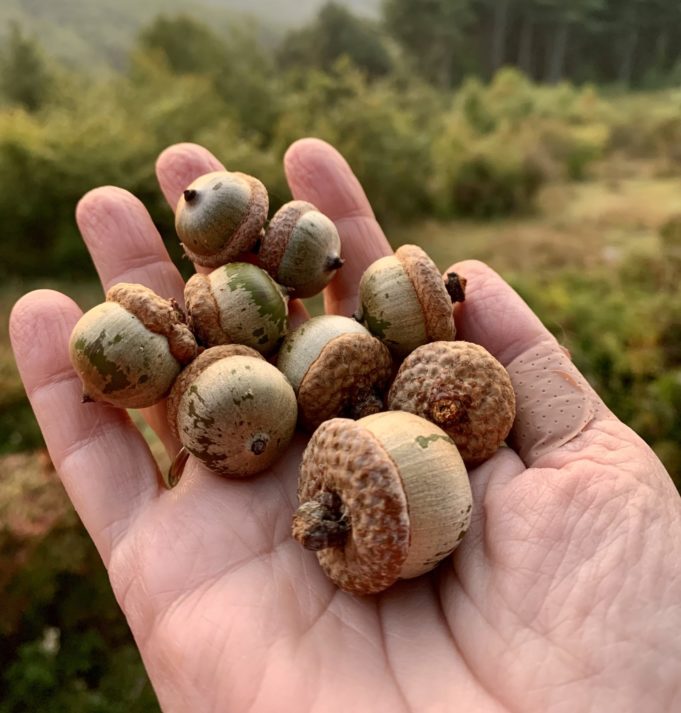
And so I started collecting. A handful, at first, my quest to find—and save—the largest of the bunch.
I’VE BEEN DOWN a similar road before, I might as well tell you. In one of our first years on Cat’s Mountain, I was making a vast collection of wooden Santas to sell at our church’s holiday Joy Market. Santa’s nose was to be a glued-on acorn painted red, and as we had a nice driveway collection that year, I gathered a big Ziplock bagful to bring home to Lexington to continue my creating. Now if you’ve ever gathered acorns for crafting and such, you know what happened next. A little time passed during which I focused on making some other things, then I turned my attention back to the Santas, pulled out the ziplock to see EEEK, tiny little wormy creatures crawling all around. They’d emerged from the nuts, is what I realized, and I had to set the entire kingdom—crawlies and acorns alike—free.
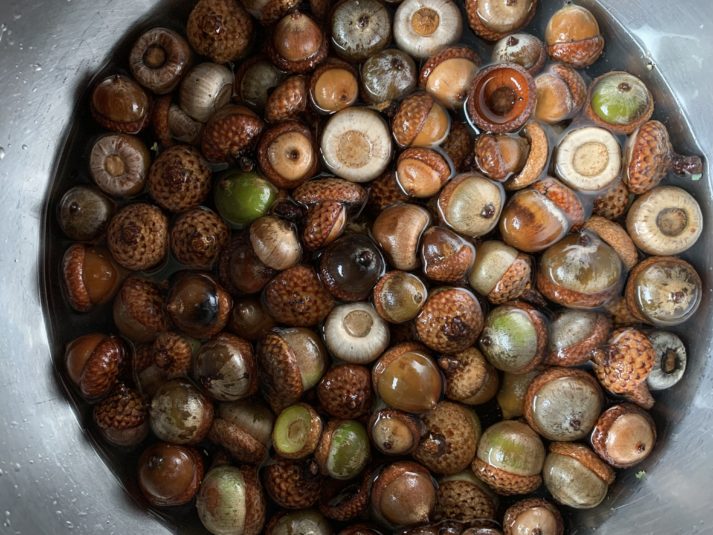
This time, I would not make the same mistake. I googled to learn there is, in fact, a way to prevent such and it only requires baking! Well, if I was going to bake up a batch, I might as well gather a panful. And if I was going to gather a panful, how pretty would they be if they filled the clear glass base of the Target lamp I’d just inherited when my daughter moved and no longer had use for it. So collect I did. Collect, collect, collect until it came time to wash, wash, wash, then bake.
I’ll save you some suspense—the baking worked great in resolving the worm problem. But when the pan came from the oven every gorgeous green acorn now was brown. Brown, brown, brown.
I loved them still, but this was not what I’d envisioned for my inspiring studio lamp. And it was clear—if I wanted the things eternally connected cap-to-nut, they’d have to be glued. Acorn by acorn by acorn.
I set to it.
You know what I also did.
I painted the cuties, many with two dang coats.
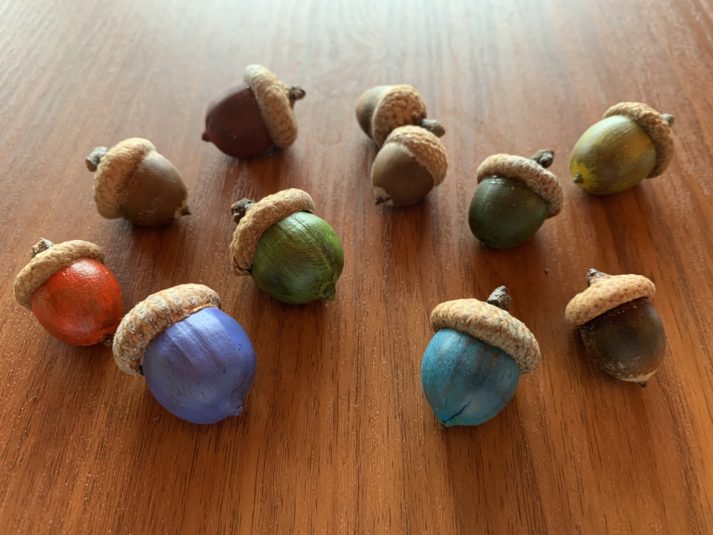
It was a commitment, I’ll tell you that, but not a taxing one as for a task it was one that required exactly no thinking or fretting or deciding. Zen work, I’d call it, something creative that required no talent or skill or expertise, and yet one that resulted in that warm, lovely, immediate gratification glow.
And then came the mold.
Yes, I left those suckers alone in the mountains for a couple of weeks and when I returned the dang things were covered in a thick layer of mold that clearly was intent on growing.
What to do, what to do now.
The only thing I could, you see it don’t you, re-wash them all. And then came the spray-shellacking, me doing my dead-level best to cover as much of the nut/hat surface as I could given the multi-sided nature of the cylindrical objects. For good measure I threw onto the pans my new collection of treasured buckeyes, gathered from a small stand of trees at the bottom of our mountain meadow, another set of which I’d already washed and baked.
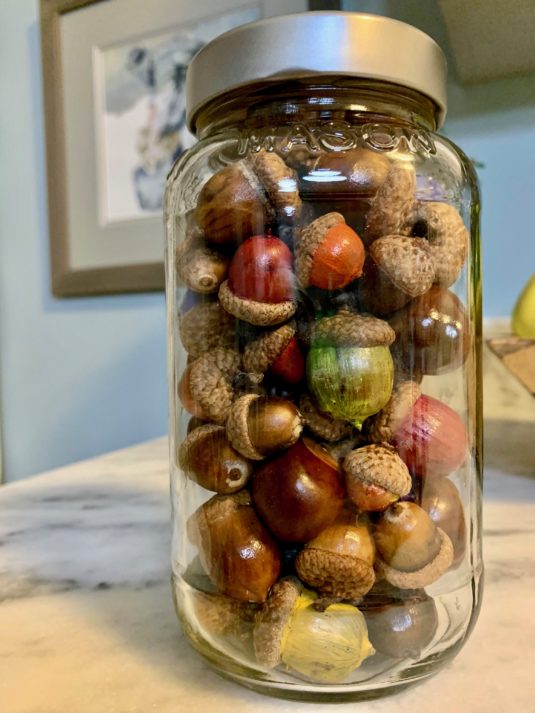
Then I loaded a test glass jar with Nature Round One (it’s cute!) and prayed to the gods of shellac they would see fit to keep the mold at bay.
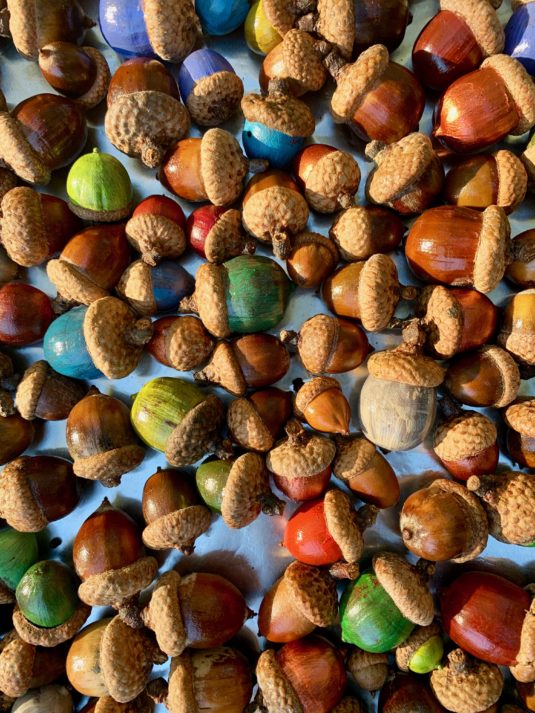
I’ve prepared baking sheet after baking sheet of washed / baked / glued / painted / shellacked acorns, with several trays patiently in wait in various stages of completion. It is a long haul effort, this I’ve accepted, and one for which I am most happy to oblige. It’s a big dang lamp is why, plus—I sometimes have to remind myself—I do have a life that also requires tending.
If only that one held the Zen my sweet little acorns do.
XXOO
an epilogue in six parts
PART ONE
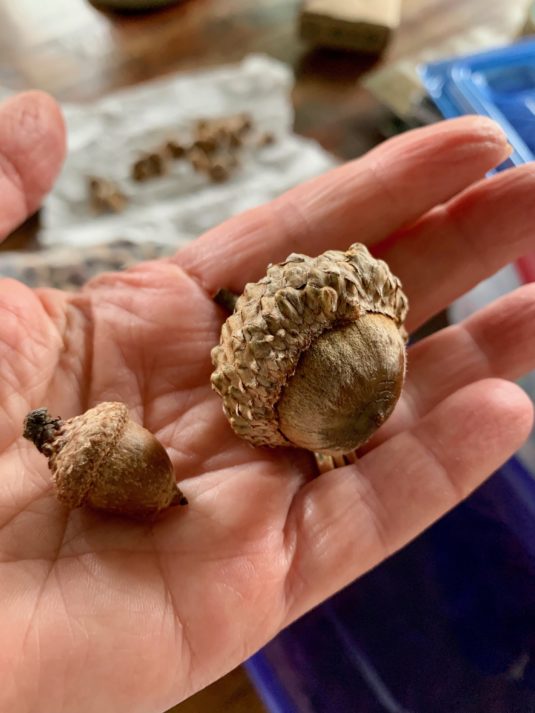
We came home to Columbia for a few weeks, my test jar in tow. Evening One, Tim, Stella and I were returning from our daily walk when, under the Old Oak at the edge of our driveway what did I spot but this.
OMG it’s an acorn FOUR TIMES the size of Mother’s! What did this mean? Is this tree even older, even more determined?
PART TWO
I researched. And as you’ve probably guessed, or perhaps you already knew, the size and shape of the acorn depends on the specific type of oak, not on the age or commitment to legacy. My heart sank a little, I cannot lie, but then you know exactly what I did. I came inside to get a bowl and went back out to gather. I got to washing and baking right away, not wanting to ever find out just how large the critters that live inside these pretty things might be.
PART THREE
Will I paint these new beauties? Will I add them to the larger collection in the base of my lamp at the top of that pretty mountain? I have a little anxiety over all these decisions, I’ll just tell you, the thought of mingling native and non-native acorns being sacrilege. They’ll never meet the ground, of course, but still.
#principles
PART FOUR
To date Tim has not staged an Acorn Intervention* even though the suggestion may have been made to him by concerned neighbors and friends.
#heknowsbetterthankheavens
PART FIVE
If you, too, find this entire crazy exercise of interest, here’s the process.
COLLECT
CLEAN (a big bowl of water and toothbrush work well, although I mostly used a paper towel and just rubbed)
BAKE (Cover a baking sheet with aluminum foil and lay out cleaned acorns. I didn’t pile them, but they did touch. I’ll bet it’s not important to bake the caps, but I did thinking what could it hurt? I baked for two to three hours at 170 degrees.)
MATCH A TOP TO AN ACORN AND GLUE IT. (I used wood glue simply because it’s what Tim had in his workshop. It worked well. I guess a glue gun would also do the trick but I haven’t tried that method.)
PAINT (pro tip–It’s much easier to paint after glueing as the cap gives you something to hold onto. I used craft acrylic paint. Lighter colors won’t cover the dark brown, so you’ll want to choose deeper hues. Also, I didn’t paint every acorn. If I liked the dark brown acorn, I left it as is.)
SEAL WITH VARNISH (I used spray varnish, glossy. I like the shine. Be sure to spray two or three or four times, letting each coat dry between, and rolling them around. Your goal is to cover as much of the surface as you can.)
PART SIX
So far, so good in my test little bottle of acorns! I promise to provide updates in the weeks to come via my newsletter, Grace Notes, so if you’re interested be sure to sign up so you don’t miss it! Plus the newsletter is bonus fun, if I do say so myself, offering little insights into the things that are capturing my attention at the time I’m writing it. I try to send one, oh, about twice a month.
I’d love to meet you there.

The pictures are amazing. Wonderful for the brain to enjoy making something with your hands. Love it!
What a fun and “nutty” experience! Thanks for sharing the journey!
Sorry I did not incorporate in Brownie and Scout projects
I did so enjoy this journey with you. I have had many such obsessions
.Julie of course has her rock obsessions. She and her dad just picked up seven at the farm. Love to you.
I am so tempted. Houstoun and I used to make homemade ornaments every year for him to gift to family and friends. One year, it was peanut snowmen …didn’t have to worry about the mold…. Just painting, finding the perfect acorn hat, gluing, making tiny scarves, wire appendages, painting happy faces and attaching baking twine for hanging on the tree…also, I did source old fashioned peanut bags for gift wrapping. I made felted acorns one year too. Maybe Tim could organize a group intervention.
Never has anyone devoted such time and effort to the acorn process. Kudos to you and the colorful journey.